DIY Mini Golf

Have science fun as a family! Complete activities with parental supervision.
Materials:
- Paper
- Pencils, pens or markers
- A small plastic or rubber ball
- A cereal box
- Assorted household items that do not break easily (e.g. cans of soup, books, toilet paper rolls, etc)
- Optional: Protractor
Procedure
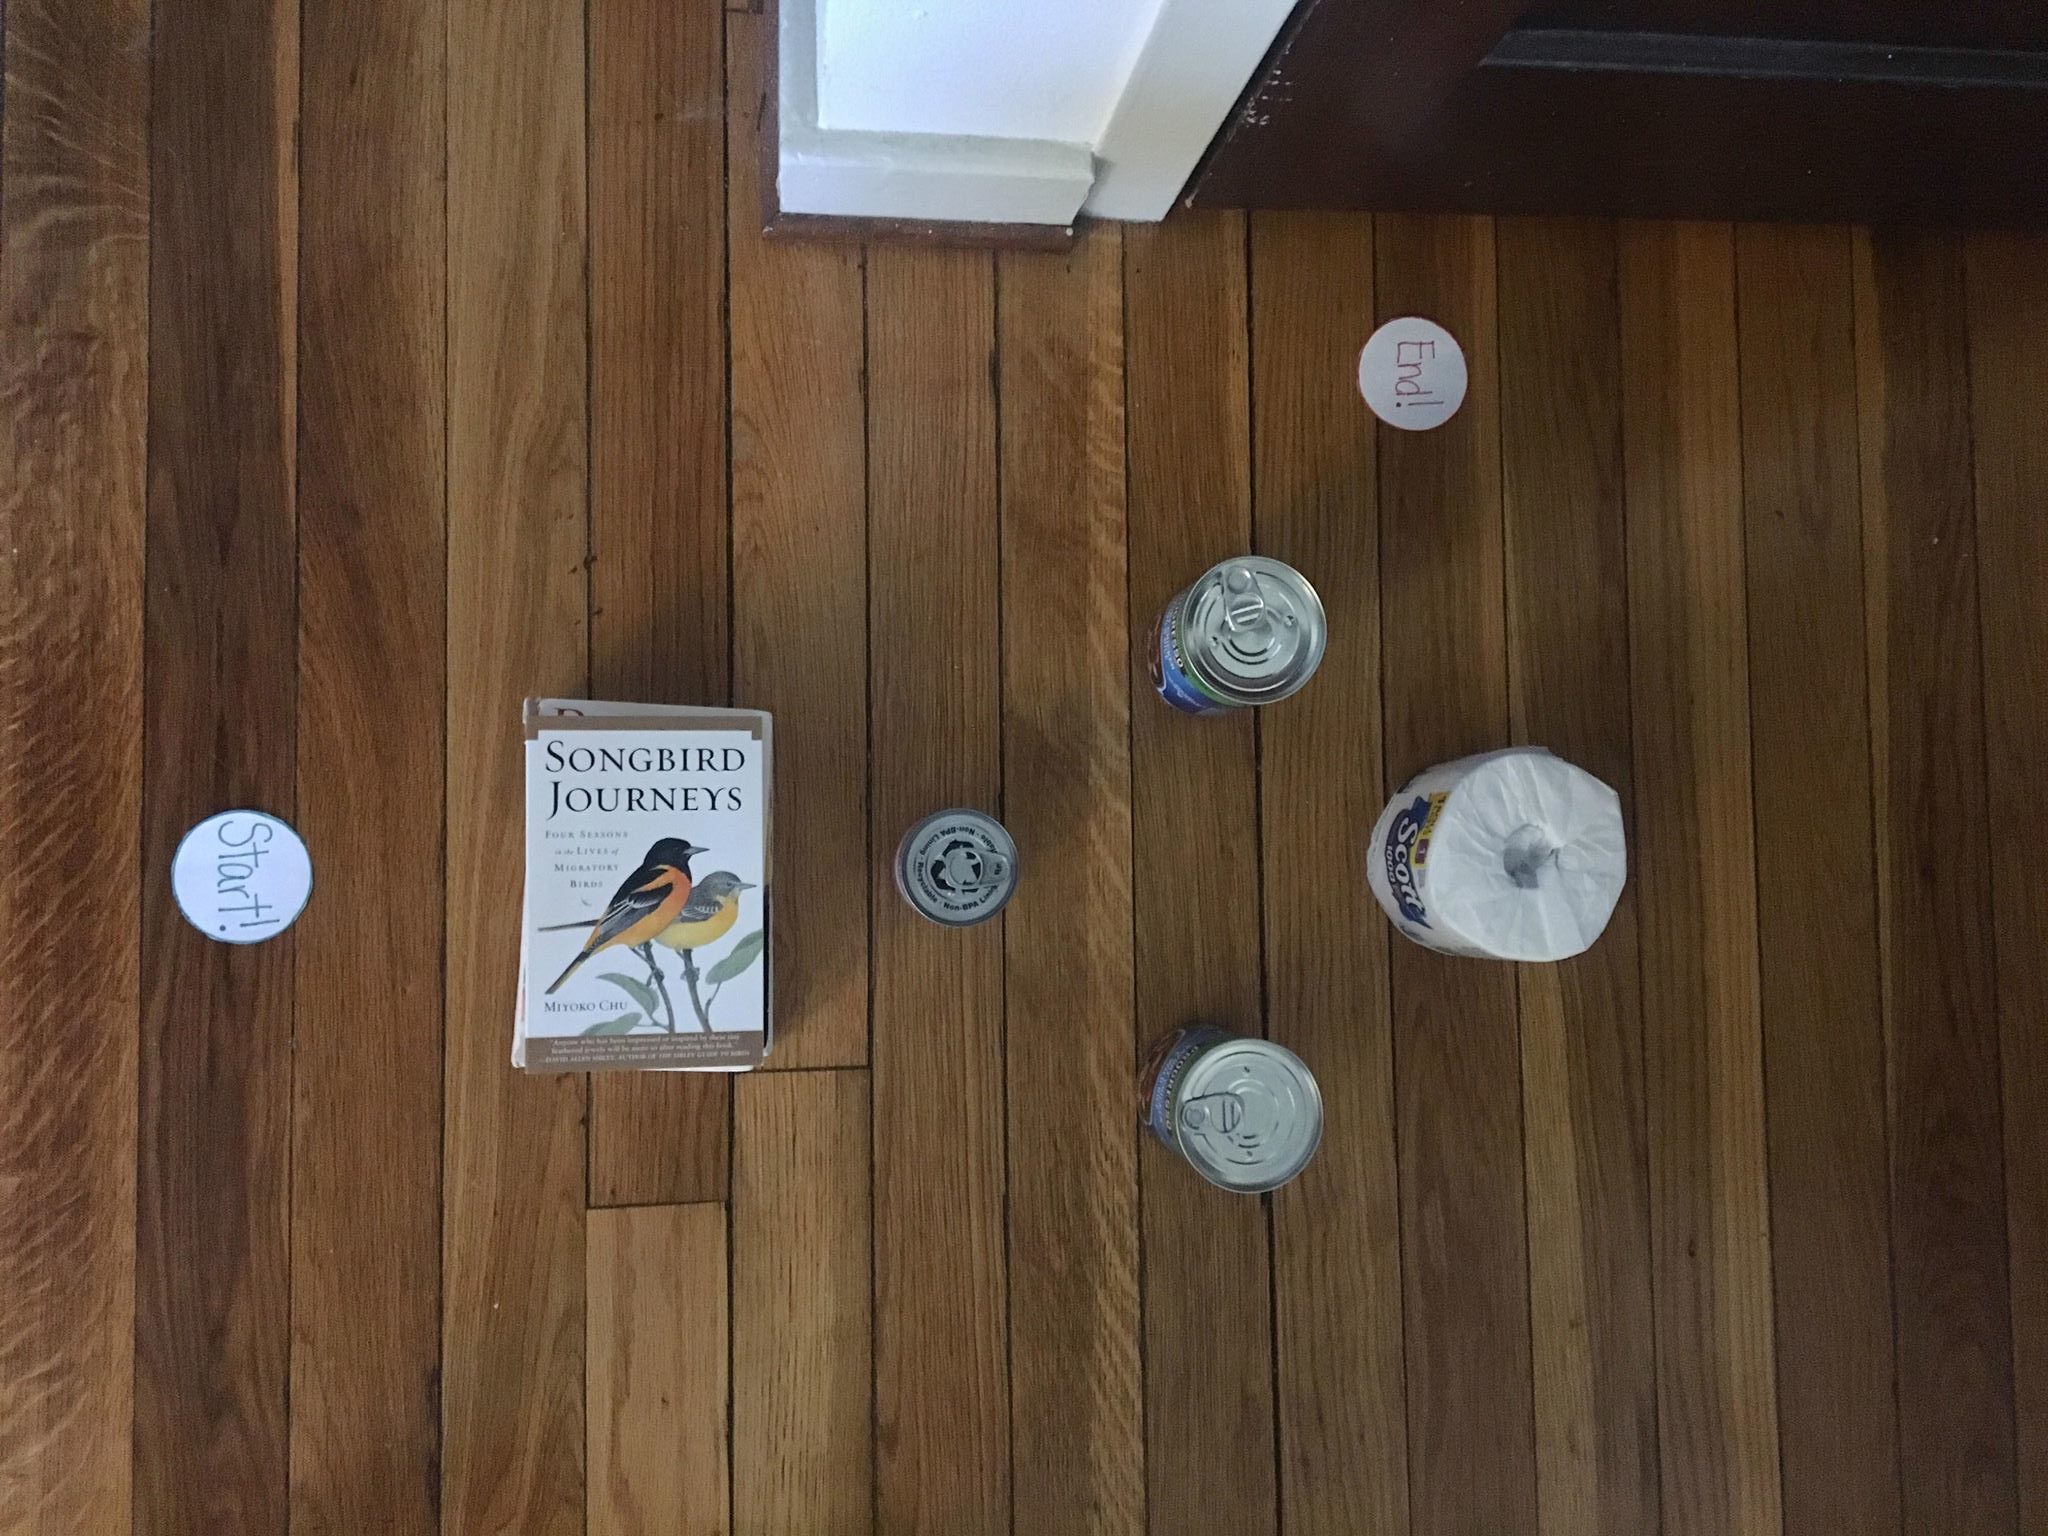
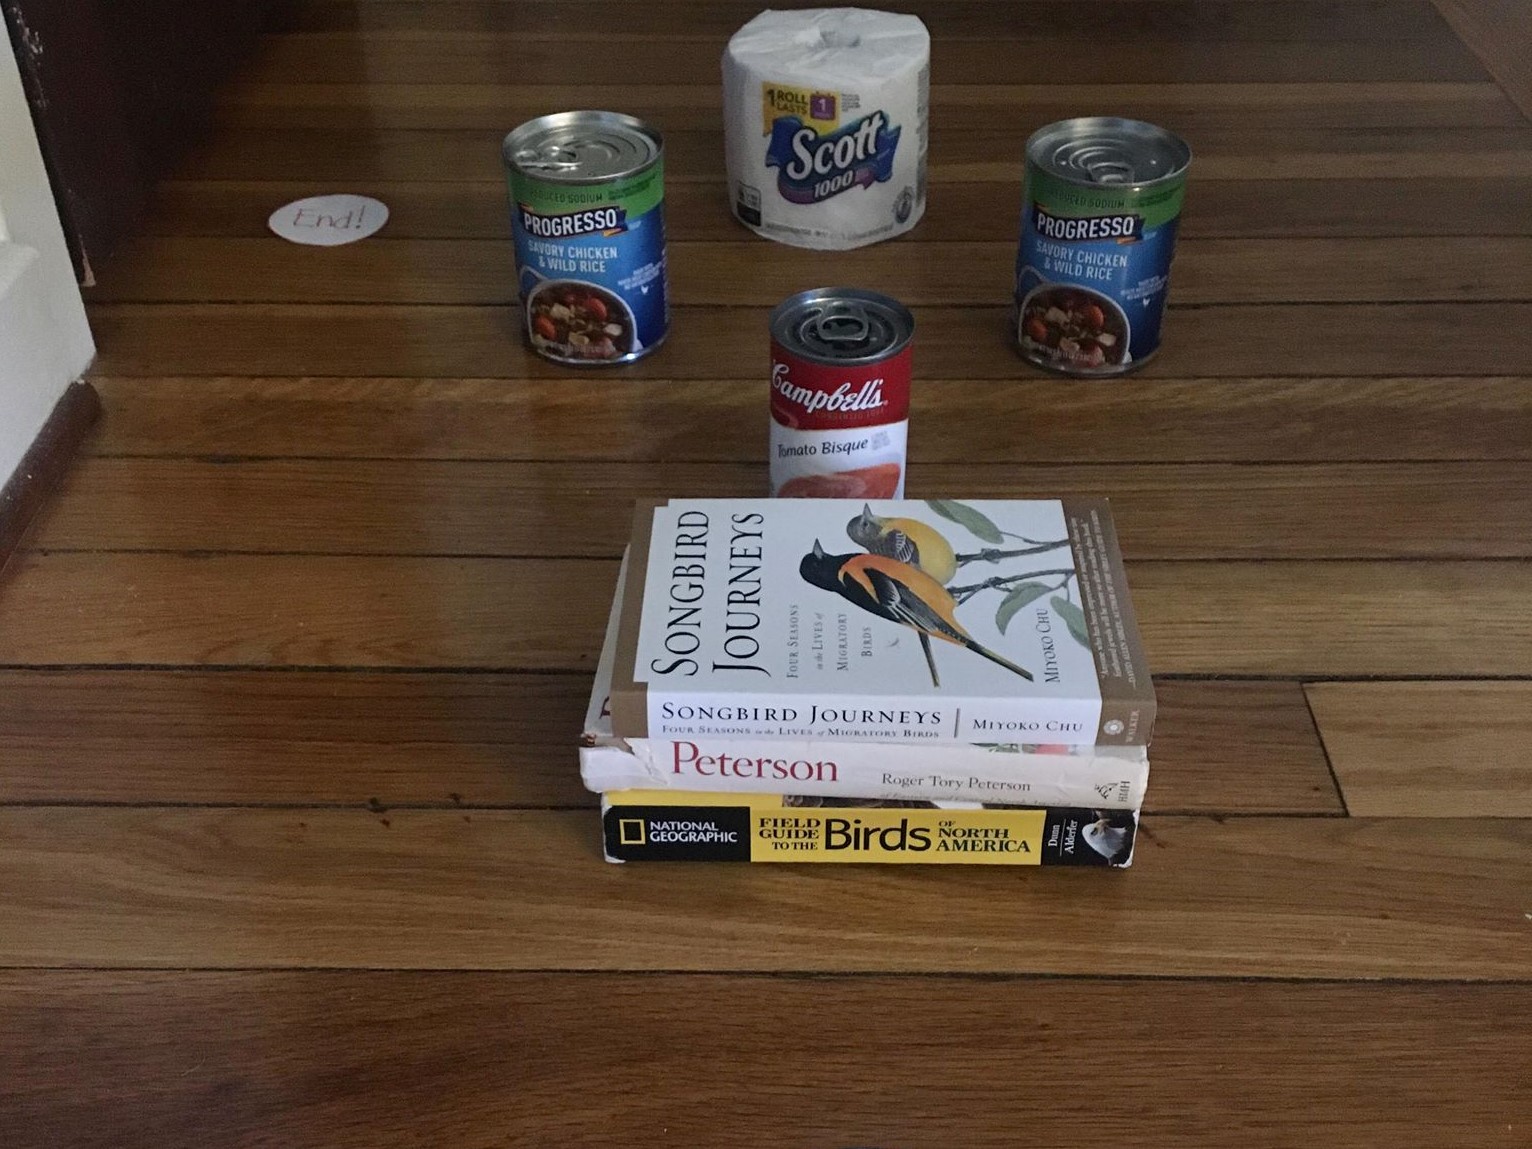
- Gather household items that you would use to create a mini golf course in your home.
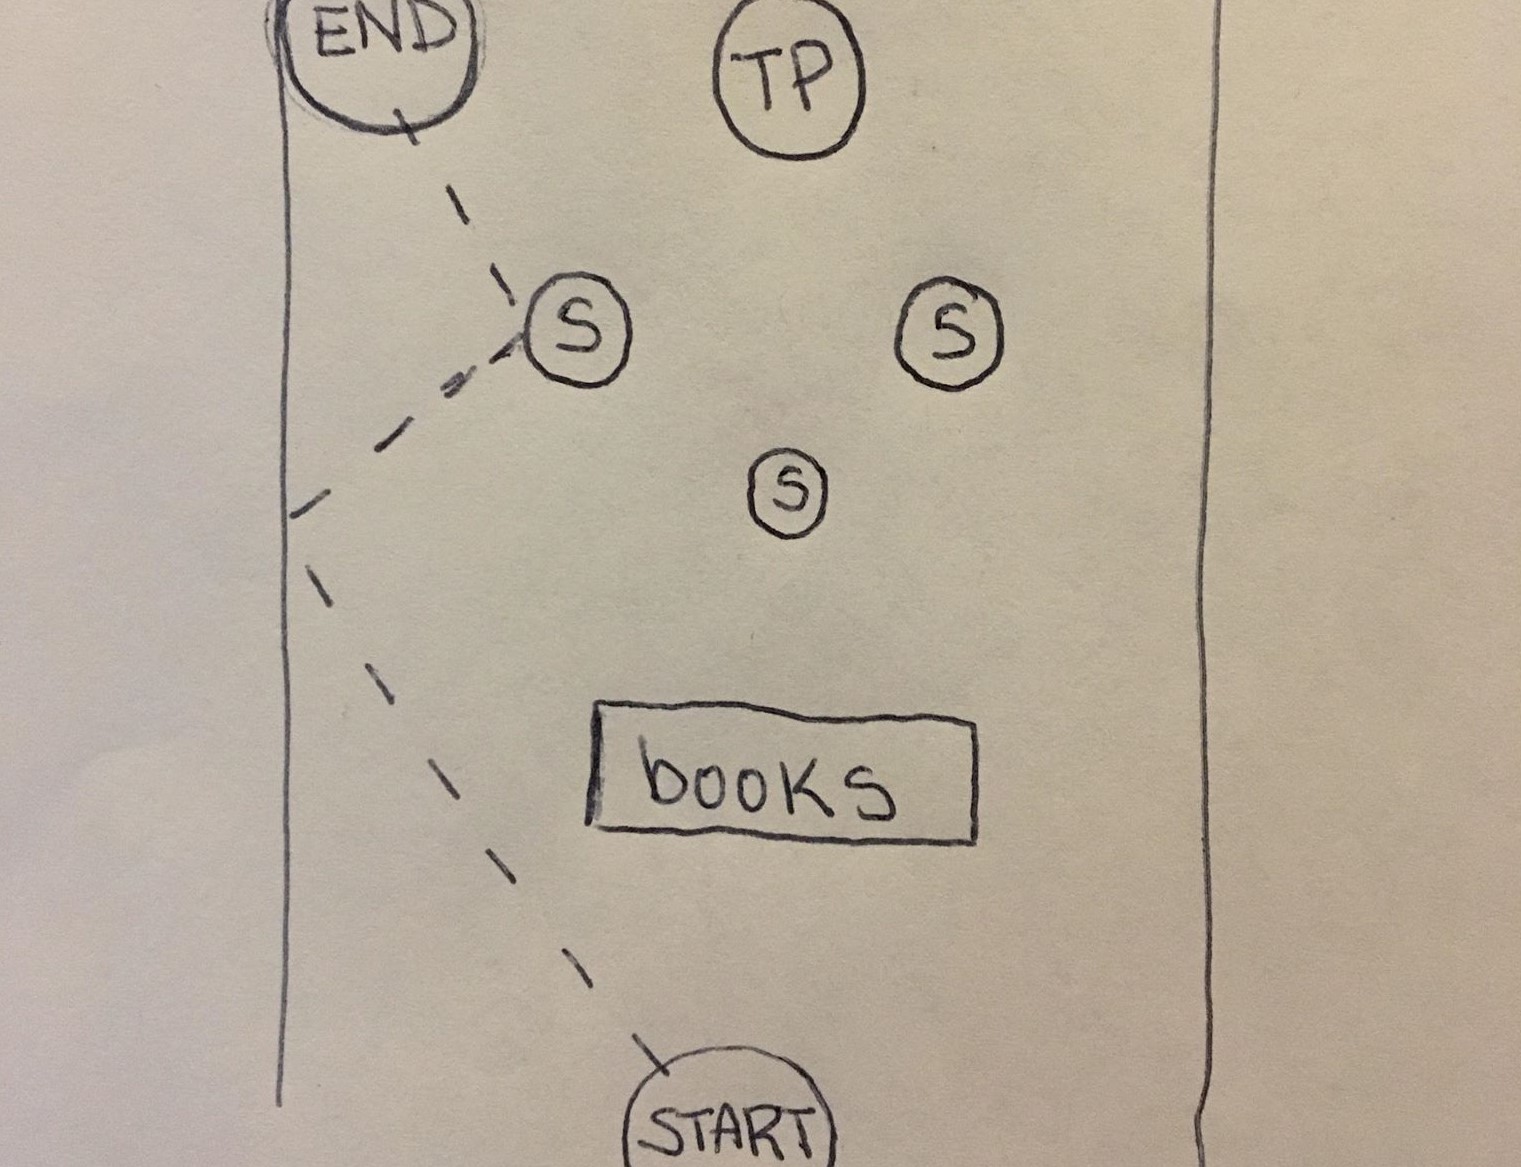
- Take a blank piece of paper and sketch out an obstacle course, keeping in mind the materials you can use. Make sure to draw a “start” and “finish” in your course.
- On your sketch, draw one possible path the ball might take. When bouncing off of objects, keep in mind the Law of Reflection (see explanation below).
- Now build your mini golf course and have fun! Use a cereal box or another flat, sturdy object as a putter. Watch how the ball moves through the course. Didn’t get a hole in one? Change how you hit the ball and keep trying!
- Be sure to take a picture or video to share in the Facebook comments on the Buffalo Museum of Science or Tifft Nature Preserve pages!
What’s it all about?
Believe it or not, mini golf is all about math and physics. And the more you know, the more you can up your mini golf game.
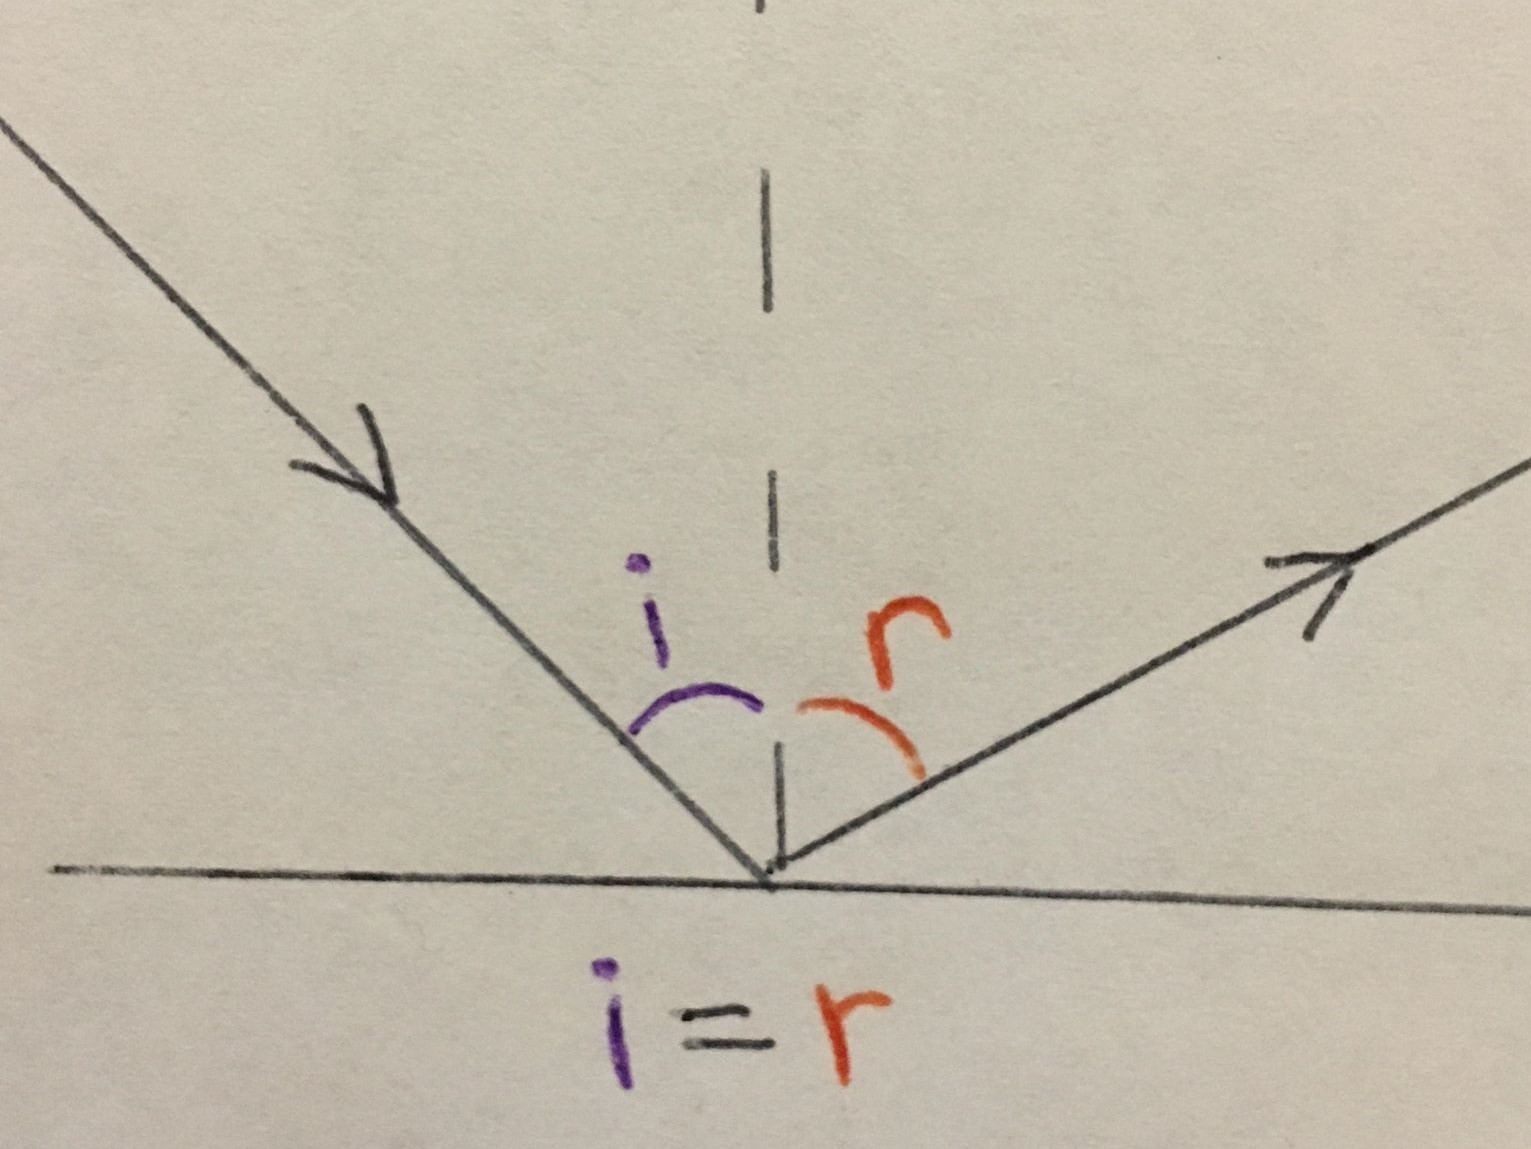
The Law of Reflection states that the angle the ball hits an object is equal to (the angle the ball bounces off an object). In other words, the angle of incidence (i) is equal to the angle of reflection (r). Check out a diagram here.
Mini golf courses use obstacles so there is no straight line from the start of the course to the end. Using their knowledge of the Law of Reflection, a player can determine how to get a hole in one even if they have never played that course before.
Try It!
- Take it a step further… using a protractor, measure the angle of incidence and the angle of reflection. What angle would the ball need to travel to get a hole in one?
- The Law of Reflection isn’t just for mini golf. Where else in your daily life do you see the Law of Reflection?
